Discover VALORANT’s nine unique maps in our comprehensive guide, covering essential features, strategies, and advice on how to enhance your gameplay and VALORANT betting knowledge.
What are the VALORANT maps called?
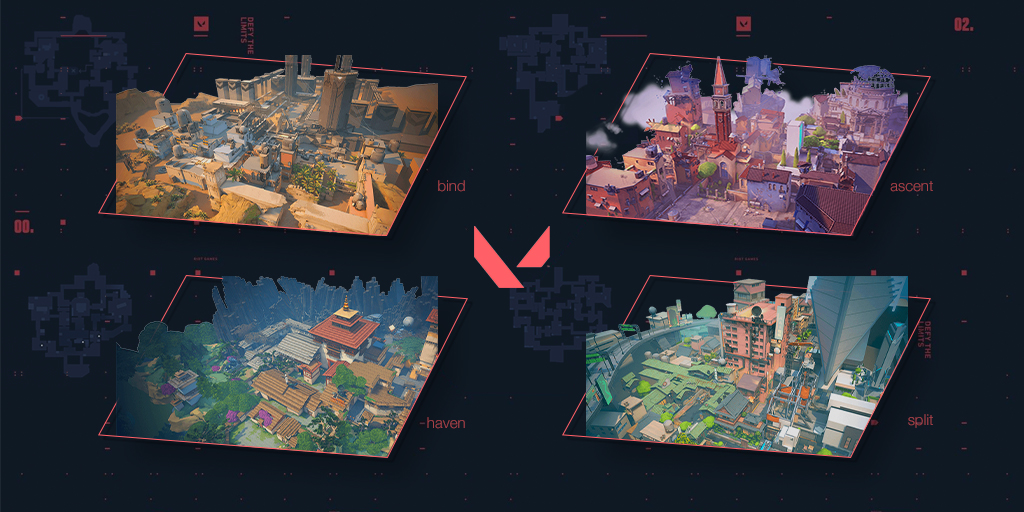
The nine maps in VALORANT are: Ascent, Bind, Haven, Split, Icebox, Breeze, Fracture, Pearl, and Lotus.
Understanding the maps in VALORANT will help you perform better in ranked play, communicate better with your team, elevate your skill in the game and enhance your VALORANT betting knowledge.
Ascent explained: A floating Venetian island featuring long sight lines
Ascent is set in a reimagined Venice, Italy, and features a four-square layout with a large, open middle area that is vital for map control. This central area, known as Mid, can be accessed from various routes, including Market and Catwalk. The two main bombsites (A and B) are located at the map's extremities.
Bombsite A has several points of entry, including A Main, A Lobby, and Garden. Defenders often set up on the site, Heaven, and Tree Room, while attackers can use smokes and utility to cut off sightlines and gain control of the site.
Bombsite B is more enclosed and offers fewer entry points, with B Main and Market being the primary access routes. Defenders can hold from the site, B Back, and B Tower, while attackers may use utility to block off defenders' sightlines and create space for planting the Spike.
Bind explained: A desert town with teleporters that allow for quick rotations
Bind, set on the Moroccan coastline, is unique due to its teleporters that connect different areas of the map. The map has no central area, and instead, the two bombsites (A and B) are connected by A Short, B Short, and B Long.
Bombsite A features a multi-level design, with A Tower (Heaven) providing a vantage point for defenders. Attackers can access the site from A Short and A Bathroom, using smokes and utility to block off sightlines. The teleporter near A Bathroom connects to Attacker Side cave which leads to B Short, allowing for quick rotations between the bombsites.
Bombsite B has an enclosed design, with the main entry points being B Short and B Long. Defenders can hold positions at B Site, B Elbow, and B Hall, while attackers can use the teleporters on A Short and B Long to change the bombsite their attacking quickly.
Haven explained: A temple featuring three bomb sites
Haven is set in the mountains of Bhutan, and features three bombsites (A, B, and C) instead of the standard two. The map's central area, Mid, connects the lanes leading to each bombsite and plays a critical role in rotations and map control.
Bombsite A is accessed from A Short and A Long, with defenders often positioned in Heaven, A Site, and A Link. Attackers can use utility to block off sightlines and isolate defenders on the site.
Bombsite B is unique, as it is located in the map's centre, with entry points from Mid Window, B Link, and C Link. The site's openness requires careful utility usage from both attackers and defenders to gain control.
Bombsite C can be accessed from C Long and Garage. Defenders often hold positions on C Site, C Platform, and Garage Window. Attackers can use smokes and utility to isolate defenders and gain control of the site.
Split explained: A futuristic neo-Tokyo with a theme of verticality
Split is located in a futuristic cityscape, and features a highly vertical design with elevated platforms and ziplines. The map has two bombsites (A and B) and a distinct middle area, known as Mid, which teams can take control of to gain access to either bombsite.
Bombsite A is accessible from A Main and A Tower (Ramps). Defenders often hold positions in Heaven, Screens, and on the site itself. Attackers can use utility to block sightlines and create space to plant the Spike.
Bombsite B features multiple entry points, including B Main, B Garage, and B Heaven. Defenders often position themselves on the site, B Back, and B Tower. Utility usage is critical for attackers to cut off defenders' sightlines and gain control of the site.
Icebox explained: A multi-level tundra
Icebox is set in a frozen tundra, and features a complex layout with numerous tight angles and elevated platforms. The two bombsites (A and B) are quite distinct, with A offering a more open area for engagements, while B is more enclosed and requires close-quarters combat. Verticality plays a significant role in Icebox, and players must be aware of threats from above and below.
Bombsite A can be accessed through A Main and A Belt. The elevated platform on A Belt adds an additional layer of strategy for attackers. Defenders often hold positions in A Nest, A Rafters, and on the site itself.
Bombsite B has entry points from B Main and B Yellow. The multi-level design offers various angles for defenders, who often hold positions in B Snowman, B Orange, and B Green. Attackers need to coordinate utility usage to isolate defenders and secure the site.
Breeze explained: An Operator’s paradise
Breeze is set on a remote island in the Caribbean, and features wide-open spaces and long sightlines. This map has two bombsites (A and B) and an open middle area, known as Mid, which can be used to rotate between the bombsites. Snipers and long-range weapons are particularly effective on Breeze due to its open design.
Bombsite A has multiple entry points, including A Main, A Cave, and A Hall. Defenders often hold positions on A Site, A Pyramids, and Mid Nest. It is essential that Attackers use smokes and other forms of utility to take control of the bombsite.
Bombsite B is accessed through B Main and B Tunnel. Defenders typically hold positions in B Site, B Arch, and B Stairs. The open design of the site allows for long-range engagements, and attackers must use utility effectively to gain control.
Fracture explained: A map divided by space-time
Fracture is set in a remote research facility, and features a unique design with two distinct halves connected by a central area with a zipline. The map has two bombsites (A and B) and a Z-shaped layout, which offers attackers multiple points of entry and rotation options.
Bombsite A can be accessed from A Main and A Drop. Defenders often hold positions in A Site, A Tower and A spawn. Attackers will want to use smokes and other similar abilities to block the sightlines from A spawn in particular to take control of the site easier.
Bombsite B features entry points from B Main and B Arcade. Defenders typically position themselves on B Site, Tower, B Generator and B Canteen. Attackers can use the Dish area to their advantage, flanking or cutting off rotations, adding an extra layer of strategy.
Pearl explained: An underwater utopia
Pearl, set in a seaside resort inspired by the French Riviera, features a blend of close-quarter areas and long sightlines. The map has two bombsites (A and B) and a central area known as the Plaza, which is crucial for rotations and map control.
Bombsite A is located within a luxurious hotel, and can be accessed through A Main, A Art, A Secret, A Flowers Defenders often hold positions in A Site at A Dugout and A Link, while attackers must use utility to gain control.
Bombsite B, positioned in an open courtyard, offers long-range engagements with entry points from B Club, B Main, B Link, B Tower and B Tunnel. Defenders typically hold positions in B Hall, B Screen and B Tower.
The Plaza, at the map's centre, allows for fast rotations and flanking opportunities. Control of this area provides a significant advantage for either team.
Lotus explained: A temple with revolving doors
Lotus is the newest addition to VALORANT and is located in a temple in East Asia. Lotus is the first map in VALORANT to feature revolving doors, and the second one to feature three bombsites (A, B, and C).
Bombsite A is the most complex of the three bombsites, with a rotating door that goes into A Tree, and A Main, which is the primary walkway that leads into A site and is connected to the B bombsite through A Link. The main bombsite is accessible through A Top, A Drop, and A Tree.
Bombsite B is located in the centre of map and is shaped like a square. There are four entrances into the B bombsite: A Link, B Upper, B Main, and C Link. Due to the close-quarters nature of the bombsite, it will be important for attackers to deploy their abilities to create space and isolate defenders holding the chokepoints on the site.
The final bombsite to discuss is Bombsite C. The middle of the bombsite is elevated on a platform, and has three ways for players to access it: C Main, C Hall, and C Waterfall. Due to nature of the bombsite, Defenders will typically have a sentinel agent defend it.
Understanding the intricacies of each map in VALORANT is essential for improving your gameplay, maximizing your team's potential as well as your knowledge when betting on VALORANT Esports. By learning the layouts, callouts, and strategies for each map, you'll be better equipped to make informed decisions and succeed in this competitive first-person shooter.